Using LightTPD with XAMPP on windows
I recently setup LighbetTPD on my machine because there is a need for me to use LightTPD server to achieve a video delivery with HTTP Pseudo-Streaming. I decided to install it on windows since I use windows more often for development. The H264 streaming module works well on Apache but I am working more with the FLV streaming module which works well on LightTPD. I once tried installing mod_flvx.c on RH5 for Apache but it seems not to work well for me.
I had to dive into LightTPD and I think it’s a great decision. Prior to the installation of LightTPD on windows, I use the Apache on XAMPP as my web server. So, I will like to show you how I use the PHP (and MySQL – this will work well anyway, as far as the service is running) in XAMPP for LightTPD. You may be thinking; “why would you wanna do that since there is a WLMP webserver package that has all in one?”. Well the answer is: “I want to keep my Apache server and I don’t want to have two MySQL server or have two instance of php.ini file”. So follow this simple steps:
Firstly, download the Win32 version of LightTPD from the WLMP Project; I prefer using the win32 version, you can use the .zip one if you want to.
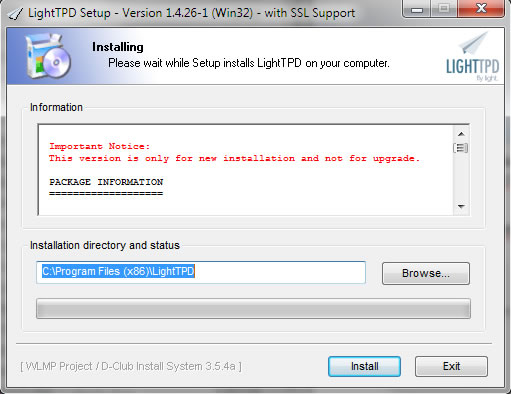
Double-click on the downloaded file to install LightTPD on windows. By default, the installation directory is “C:Program FilesLightTPD” but I mine was installed in D:LightTPD since my XAMPP is in the same D: drive.
After completing the installation, you will need to start the server by going to the LightTPD directory and look for the file ‘TestMode.bat’. Double click on it to start the server; a console window opens to indicate the server has started successfully. If you have port 80 in use, you will come across an error saying: can’t bind to port: 80 Address already in use. The default server.port on LightTPD is 80. Since my Apache is runing on port 80, I will have to modify the lighttpd-inc.conf file for LightTPD to work with an alternative port like 81 or 8080.
Open [LightTPD-Directory]conflighttpd-inc.conf, remove the comment for server.port = 80 and modify the value to whatever port you want to use; as far as it’s not in use. Mine is server.port = 81. Save and run the ‘TestMode.bat’ again. If everything is set properly, the server will start.
Navigate or point your browser to http://localhost/ or http://127.0.0.1/ to see if LightTPD server is working.
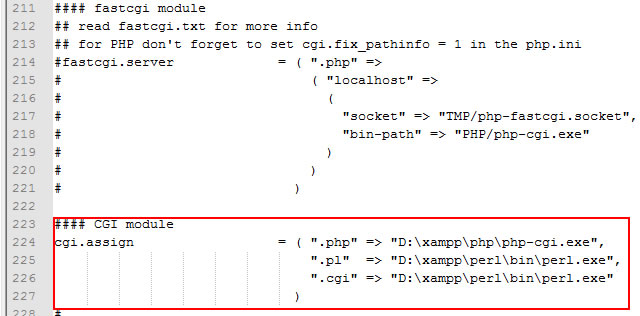
Now you will have to configure the lighttpd-inc.conf to work with PHP. The PHP I used is actually that of XAMPP as I mentioned earlier. So modify cgi.assign value to “.php” => “D:xamppphpphp-cgi.exe” [D:xampp should be your XAMPP installation directory]
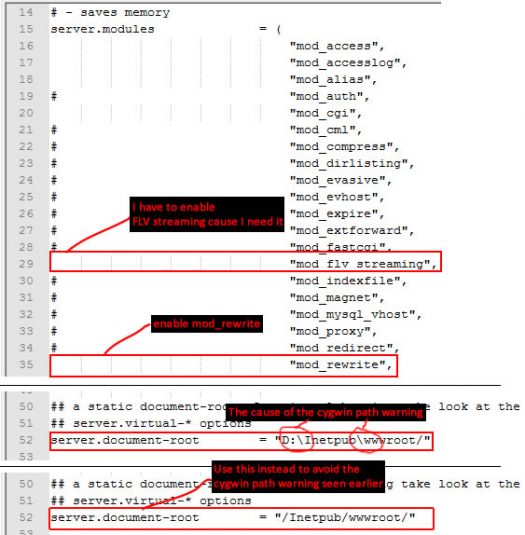
Modify other necessary lines you will/might need.
mod_flv_streaming is need (by me)
mod_rewrite is so need ( by me )
and so on.
To avoid the cygwin warning seen earlier, set the server.document-root value to have a forward slashes without the D: or C: as in “/Inetpub/wwwroot/”
After all modification, save the file; press Ctl+C on the console window to shutdown the server and re-launch, i.e double-click on ‘TestMode.bat’ to start the server again. You can also set LightTPD to run as a service. Open [LightTPD-Directory]bin and double-click on Service-Install.exe to install the service.
You are set and good to go. To test if PHP is working, create a .php file with this content
<?php phpinfo(); ?>
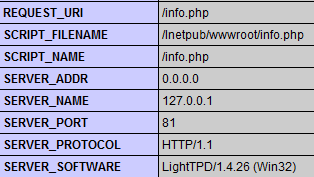
Place the file in the htdocs directory, mine is D:Inetpubwwwroot and navigate to the URL, i.e http://127.0.0.1/info.php. You should be able to see the standard phpinfo() details.
That’s it!
I hope you’ll get this if you want to install LightTPD this way. Thanks for reading and please leave a comment to let me know how far it goes.


